Why Quality Education Matters for Every Student Today
Literature |
2026-10-13 10:15:12
 Russian
 English
 Romaian
 Portuguese (Brazil)
 Greek
Greek
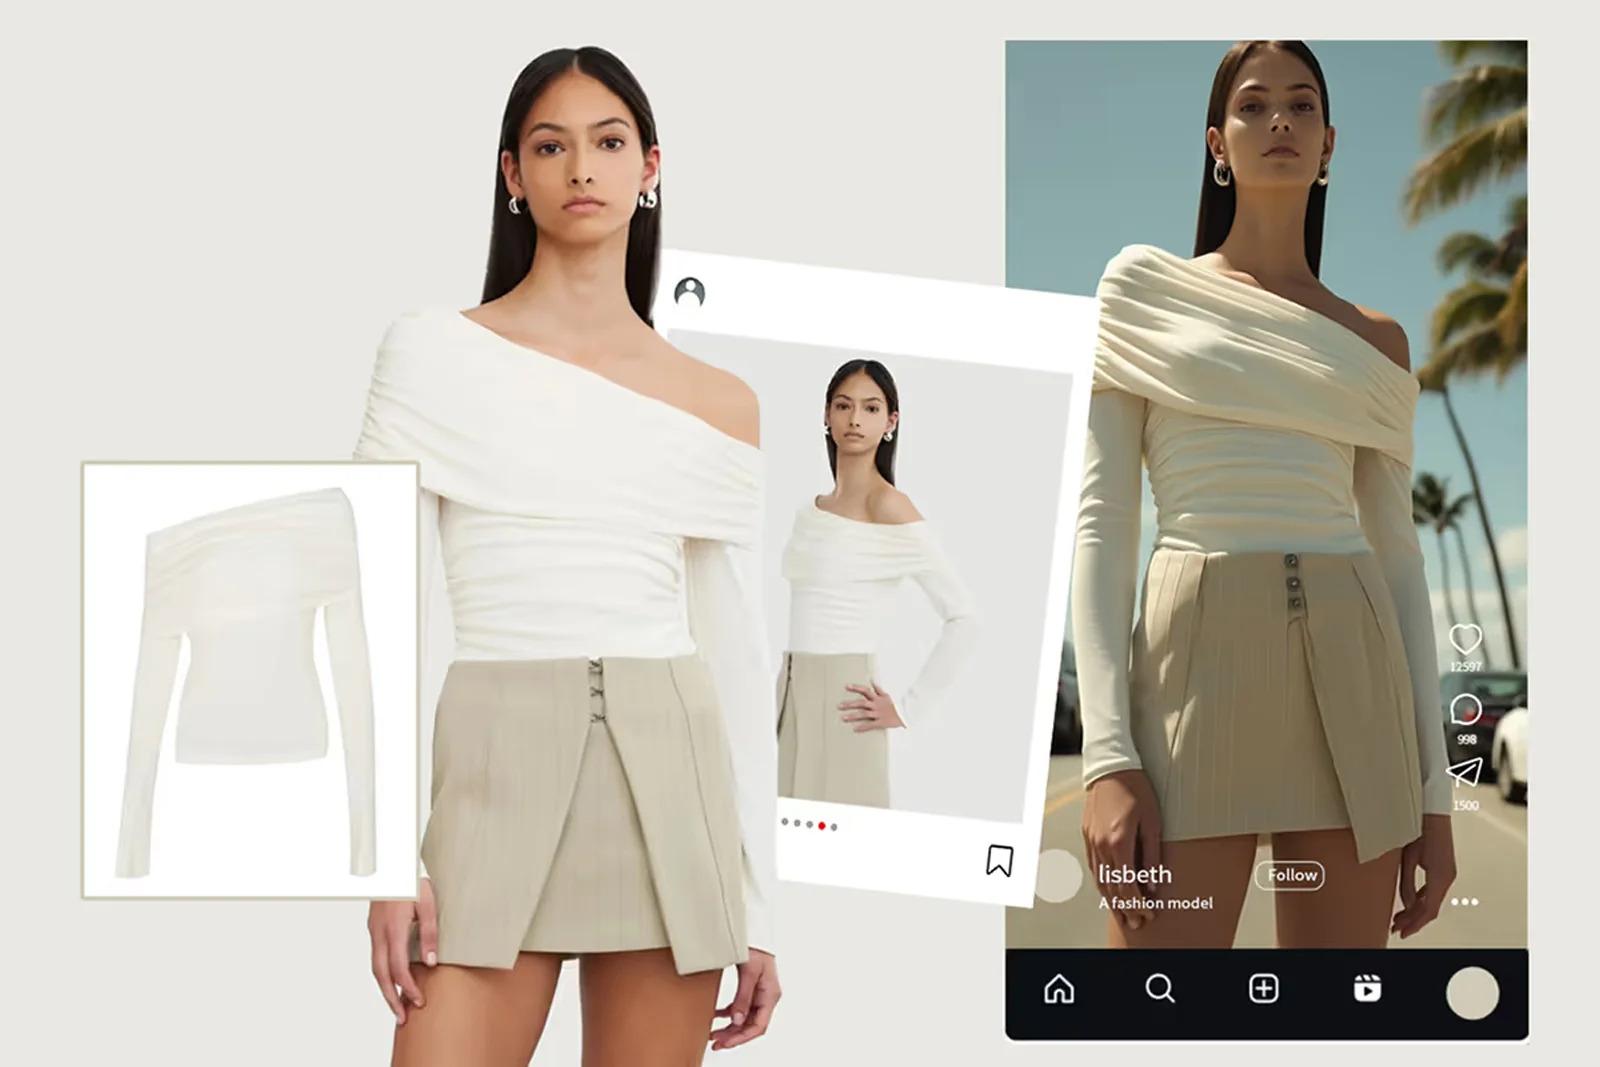
Turning a written idea into a visual used to require illustration skills, photography equipment, or professional design software. Today, an AI image generator from text allows users to describe a scene in everyday language and transform that description into a visual concept.
Whether you need a blog illustration, a creative advertisement, a fantasy landscape, or a visual concept for a new product, text-to-image technology can help you explore possibilities quickly.
However, generating a useful image involves more than entering a few words. Clear prompts, thoughtful composition, appropriate style choices, and careful editing all contribute to a better result.
This guide explains how text-to-image AI works, how to write effective prompts, and how to use the resulting images in creative and professional projects.
A text-to-image AI generator is a tool that interprets a written description and produces an image based on that instruction. Depending on the model, the result might be a realistic photograph-style scene, a digital illustration, a painting, a 3D-style render, or an abstract composition.
For example, a user could enter:
"An aerial view of a coastal city at sunset, warm golden lighting, modern architecture, calm ocean, cinematic photography, wide-angle composition."
The system uses its learned visual patterns to create an image that attempts to match the description.
Different models may interpret the same prompt differently. That is why experimenting with prompt wording and comparing multiple results can be useful.
Before generating an image, determine exactly what you want the viewer to see.
Instead of beginning with a broad idea such as "beautiful nature," identify the main subject and the purpose of the image.
For example, if you are creating a hero image for a travel website, your brief might specify a mountain landscape, a winding road, early morning mist, and enough empty space for a headline.
A clear brief helps you decide which details belong in the prompt and which are unnecessary.
Ask yourself three questions:
What is the main subject?
What should the image communicate?
Where will the image be used?
These answers provide a foundation for more precise image generation.
A strong prompt gives the image generator clear instructions without overwhelming it with contradictory details.
Try this structure:
Subject + setting + visual style + composition + lighting + color palette + intended use.
For example:
"Create a realistic product-style photograph of a reusable water bottle on a light stone surface, surrounded by fresh green leaves. Use soft natural window lighting, subtle shadows, a clean neutral background, and a premium minimalist aesthetic. Compose the image vertically with the product centered and no text or logos."
This prompt describes the subject, environment, lighting, style, and composition.
For a different project, you could use the following examples.
For a blog illustration:
"Create a clean editorial illustration explaining cloud computing, with interconnected servers and digital data streams, a blue-and-white palette, balanced composition, and a professional technology publication style."
For social media:
"Create a bold promotional background for a fitness campaign, featuring an energetic gym environment, dramatic lighting, strong contrast, and empty space at the top for a headline. Use a vertical composition."
For conceptual artwork:
"Create a surreal floating city above the clouds at sunrise, featuring intricate architecture, atmospheric depth, warm highlights, and a cinematic fantasy-art style."
Treat these prompts as starting points. Adjust the details to suit your intended audience and creative direction.
The same concept can produce very different results depending on the requested style.
Useful for lifestyle scenes, conceptual photography, editorial visuals, and certain product-marketing concepts. Review realistic outputs carefully for distorted objects or misleading details.
Suitable for educational content, explainers, blog graphics, and visual storytelling.
Useful for conceptual product presentations, technology visuals, and creative campaign mockups.
Works well for clean website layouts, simple editorial graphics, and designs where the message should remain the main focus.
Can support storytelling, campaign concepts, entertainment projects, and dramatic visual presentations.
Choose a style that complements the content rather than selecting one simply because it looks impressive.
Your first image may not match the original idea perfectly. The subject might be positioned incorrectly, the background may be too busy, or the lighting may not suit the intended design.
Instead of rewriting the entire prompt immediately, change one or two details at a time.
For example:
Change the camera angle.
Simplify the background.
Adjust the lighting.
Specify a different color palette.
Move the main subject to one side.
Request additional negative space for text.
This approach helps you understand which instructions affect the output.
When a result is close to your target, refine it rather than starting again without a reason.
An image should be designed for its intended placement. A composition that looks excellent on a website banner may not work well in a square social media post.
Common starting points include:
| Use case | Suggested aspect ratio |
|---|---|
| Website hero banner | 16:9 or wider |
| Blog featured image | 16:9 |
| Instagram square post | 1:1 |
| Pinterest-style graphic | 2:3 |
| Vertical social content | 9:16 |
| Presentation slide | 16:9 |
These are starting recommendations rather than universal requirements. Check the dimensions recommended by the destination platform and your website template.
If the generator does not provide the exact ratio you need, crop the image carefully and check that the main subject remains visible.
AI-generated images can contain mistakes, even when the overall composition looks convincing.
Before publishing, inspect the image for:
Distorted hands, faces, or objects
Inconsistent lighting and shadows
Unintended text or symbols
Incorrect product details
Unnatural proportions
Visual elements that conflict with the brand
Text and logos deserve particular attention because image models may reproduce them inaccurately.
Use an appropriate editing tool to correct issues where possible. Pyxa AI also offers an Advanced Image Editor for image refinement, including background changes and other editing tasks described on its product page.
For professional work, the goal is not merely to generate an image but to prepare an accurate, polished asset that is ready for its intended use.
Image optimization is important when generated visuals are used on websites.
Large image files can increase page weight and affect loading performance. Poorly chosen images can also create accessibility problems.
Follow these practices:
Use descriptive file names. Name the file according to its actual content, such as ai-generated-futuristic-city.webp, rather than leaving an unhelpful default filename.
Write useful alt text. Describe the meaningful visual information. For example: "Illustration of a futuristic city with connected digital networks." Avoid stuffing keywords into alt text.
Choose an appropriate format. WebP or AVIF may reduce file size while maintaining suitable visual quality, depending on browser support and your workflow.
Resize images appropriately. Avoid serving unnecessarily large files when a smaller version will work.
Compress before uploading. Check the final image for visible quality loss after compression.
Maintain visual relevance. An image should support the page's topic rather than exist solely to insert another keyword.
These steps can improve usability and help keep your website efficient. Image optimization alone does not guarantee higher search rankings.
Before using a generated image in a commercial project, review the tool's terms and the rules that apply to your intended use.
Avoid using protected logos, copyrighted characters, or recognizable people in ways that could infringe rights or imply false endorsement. Do not create misleading imagery for products, services, or advertising claims.
If you use reference images, ensure you have permission to upload and modify them. For sensitive or confidential material, review the platform's privacy and data-handling terms.
Responsible use helps reduce legal, reputational, and brand risks.
Pyxa AI provides an AI Image Generator designed to help users turn written descriptions into visual concepts. Its broader visual creation offering also includes tools for editing images, creating product visuals, and developing designs.
For creators who produce content regularly, keeping image creation and related visual tasks within a connected workflow may help reduce unnecessary switching between tools.
Before selecting a plan, review the current feature list, generation limits, available models, export options, and usage terms to confirm that they meet your requirements.
Explore the Pyxa AI Image Generator to learn more about the tool and its available capabilities.
Choose an AI image generator, describe the subject and scene in a prompt, select available style or output settings, and generate the image. Review the result and refine the prompt if necessary.
Yes. Some models can produce convincing photographic-style images. Results vary depending on the model, prompt, and subject, so inspect important details before using an image professionally.
A good prompt clearly describes the subject, setting, style, composition, lighting, and relevant output requirements. Specific instructions generally provide a better starting point than a vague description.
Generally, this is possible when the tool's terms and applicable laws permit it. Optimize image dimensions and file size, use appropriate alt text, and verify that the visual accurately represents the page's content.
They may be suitable, but commercial use depends on the platform's terms, the image's contents, and applicable intellectual property and privacy laws. Check these conditions before publishing or distributing the image.
Not entirely. It can accelerate concept development and repetitive visual tasks, but professional design still requires judgment, creative direction, brand understanding, editing, and quality control.
An AI image generator from text makes it easier to transform written ideas into visual concepts. With clear prompts, appropriate styles, iterative refinement, and careful editing, users can develop images for blogs, websites, social media, advertising, and creative projects.
The most effective workflow combines AI's ability to explore visual possibilities with human decisions about accuracy, relevance, accessibility, and design quality.
If you want to turn your ideas into original visuals, explore Pyxa AI's Image Generator and evaluate how its features fit your creative workflow.